Sample UI
The RPG module includes a sample User Interface with some common panels found in RPG games, like the player bag, character sheet, health status, dialogue window and action bar.
The UI can be installed by importing the package located at, Assets/plyoung/plyRPG/Documentation/sample_ui.unitypackage. It will add a new folder and content, Assets/plyoung/plyRPG/GUI/. All scripts and assets related to the sample UI can be found in this folder after the import.
You will need to setup a few things before the UI will work correctly. The topics to follow will cover each section of the UI.
The Scripts and Assets
Unity 4.6 This sample is based on Unity’s new UI system. It will not work in Unity 4.5. If you wish to simply look at the scripts then do not import the Prefab folder of this package as it will crash Unity 4.5. If you did, go to \Assets\plyoung\plyRPG\GUI\ and delete the Prefab folder before attempting to load the project again.
Add the \Assets\plyoung\plyRPG\GUI\Scenes\rpg_ui.unity scene to the Build Settings, either via the plyGame Project Settings (Game Scenes) or Build Settings window.
IMPORTANT The \Assets\plyoung\plyRPG\GUI\Scripts\plyRPG_UI.cs script must be set to execute first so that it can tell the plyGame Input Manager when the UI handled mouse input, else you might find situations where a click on the UI will cause the player character to move or execute an action.
Open the Script Execution Order Settings, menu: Edit > Project Settings > Script Execution Order. Drag the plyRPG_UI.cs script onto the block that reads ‘default time’ in the Inspector. If the script appears under the ‘default time’ block, click and drag it above it or enter -100 where it the fields has the value 100. Press Apply to finish.
The main script of the UI is \Assets\plyoung\plyRPG\GUI\Scripts\plyRPG_UI.cs and is where you will find all the functions being called by the button events. This script (component) is placed on the RPG_UI object, located in the \Assets\plyoung\plyRPG\GUI\Scenes\rpg_ui.unity scene.
There are also various Block scripts located in \Assets\plyoung\plyRPG\GUI\Blocks\. These can be found in the Blox editor under GUI > plyRPG. The important one is the Load UI Block, which you want to call in the Common > On Start or Common > on State Enter Event of a Blox in the scene. You need to call this Block so that the UI scene is loaded. Note that it does not matter if you call this Block if the UI scene is already loaded (no error will occur).
Various icons and other textures/ images can be found under \Assets\plyoung\plyRPG\GUI\Res\.
There are also some prefabs, like the one for the slot used in the Bag Panel, found under \Assets\plyoung\plyRPG\GUI\Prefabs\.
Menu
The mini-menu provides a way to open the various panels of the UI.
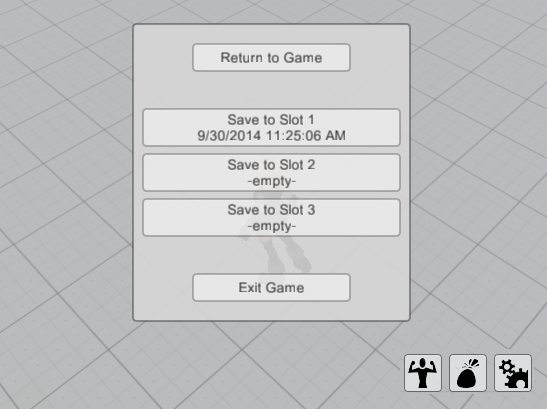
There is also an example of creating an in-game menu to save the game or exit.
Status Bars
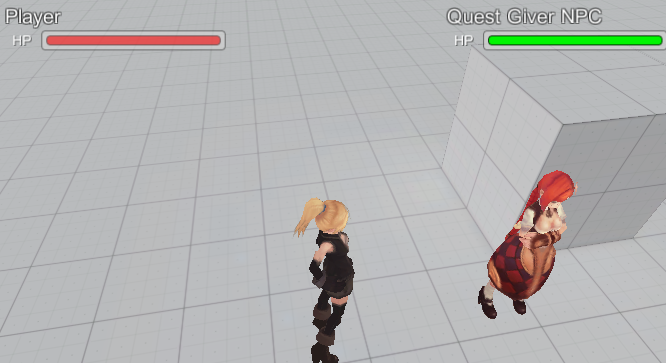
The status area shows the status bars for the Player and the Player’s selected Target. It will only show the status of the target if the target is a character. The Health Bar of the target status will change colour depending on whether the target is friendly, neutral or hostile to the player.
The Player and other Characters should make use of Actor Classes that each has an Attribute linked to the Health property in the Attributes editor.
Action Slots
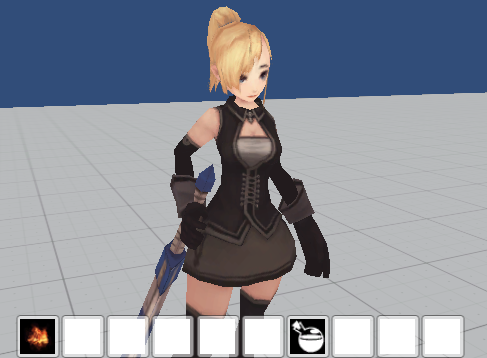
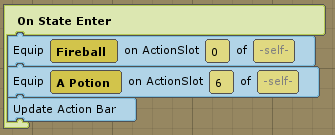
The action bar area shows buttons representing the equipped actions (Skills or Items). The Block GUI > plyRPG > Update Action Bar should be called when something is added to or removed from the player’s action slot(s). Skills and Items are added to and removed from the action slots via Blocks under Character > Action Slot.
Actions (execute Skill or use Item) can be triggered by the player by clicking on one of the buttons. The action can still be triggered in the normal way via the key binds too. By default the actions are bound the the Action 1, Action 2, etc. binds as defined in the Input Manager.
Player Bag
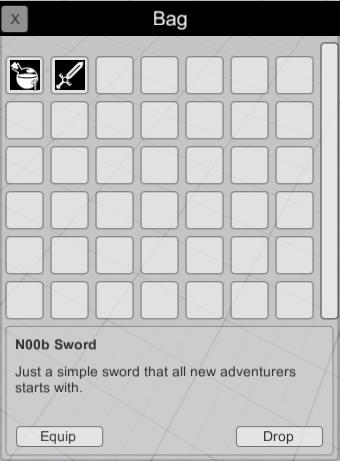
The bag panel shows the player the contents of the ItemBag component which should be on a player character object.
\Assets\plyoung\plyRPG\GUI\Prefabs\SlotButton.prefab is added to this panel when it is opened and represents each slot. This panel is not able to display items that span more than one slot.
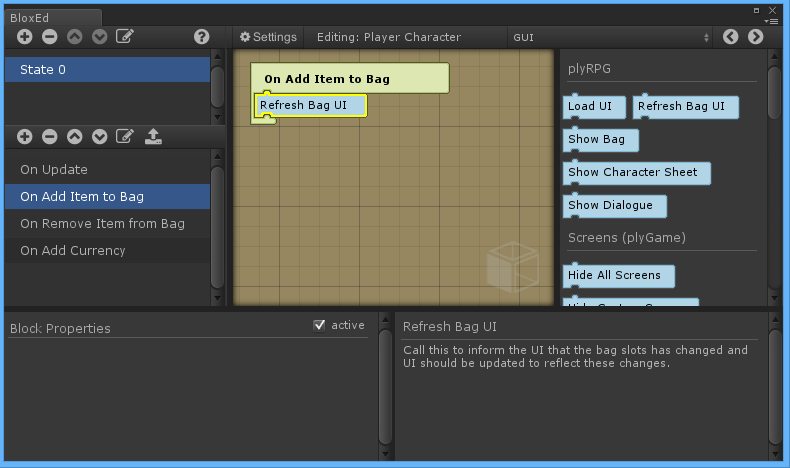
For the UI to correctly update the slots you need to add the GUI > plyRPG > Refresh Bag UI Block to the following Events of a Blox on the player character object.
plyRGG > Items > On Add Item to BagplyRGG > Items > On Remove Item from Bag
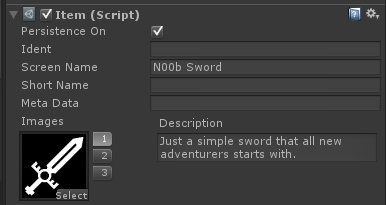
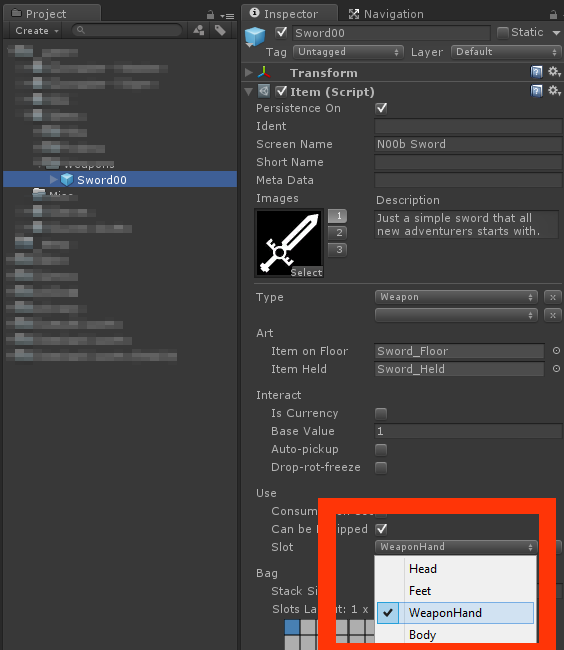
The buttons will show the image added in the Item’s inspector in image slot 1.
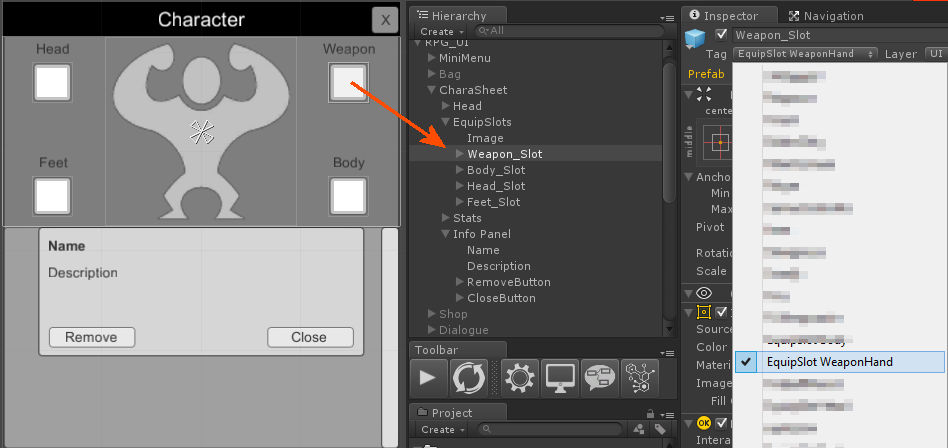
Player Info
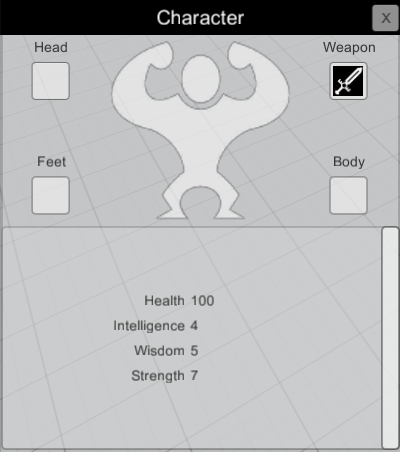
This panel shows what is in the player’s Equipment Slots and the Attributes on the character’s Actor Class.
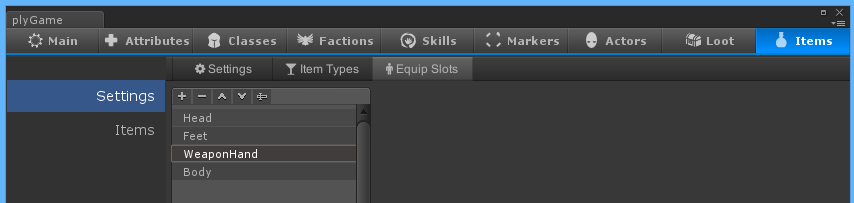
You will note that the sample has 4 equip slot buttons. You may add more or remove these as needed. It is important that you set the tags on these button objects to the same tags as defined for the equipment slots. Have a look at the Items documentation if you do not know what I am referring to.
If the buttons are not correctly tagged then they will not show the Items in the various equipment slots that you might have defined.
All the Attributes added the the Actor Class that the Player Actor is set to use will be shown in the list of attributes, except for the attribute that is linked to experience, if any.
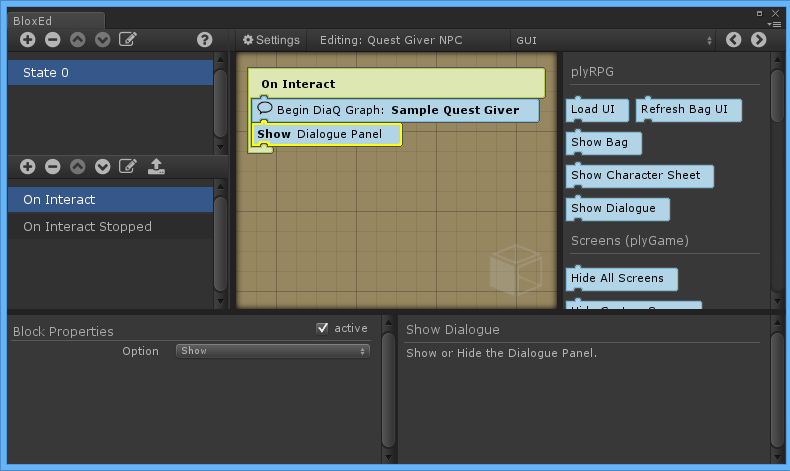
Dialogue Panel
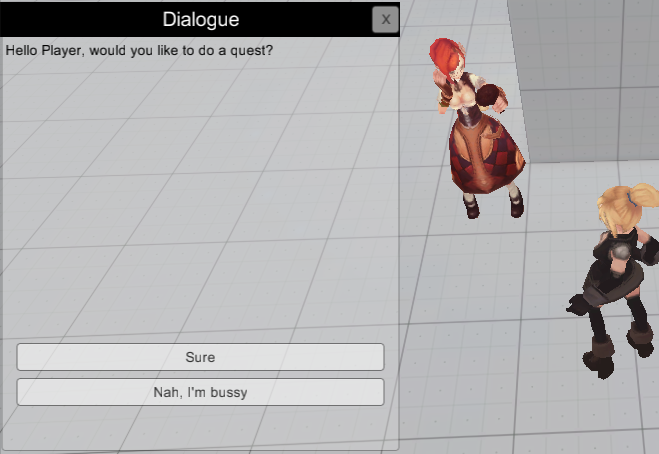
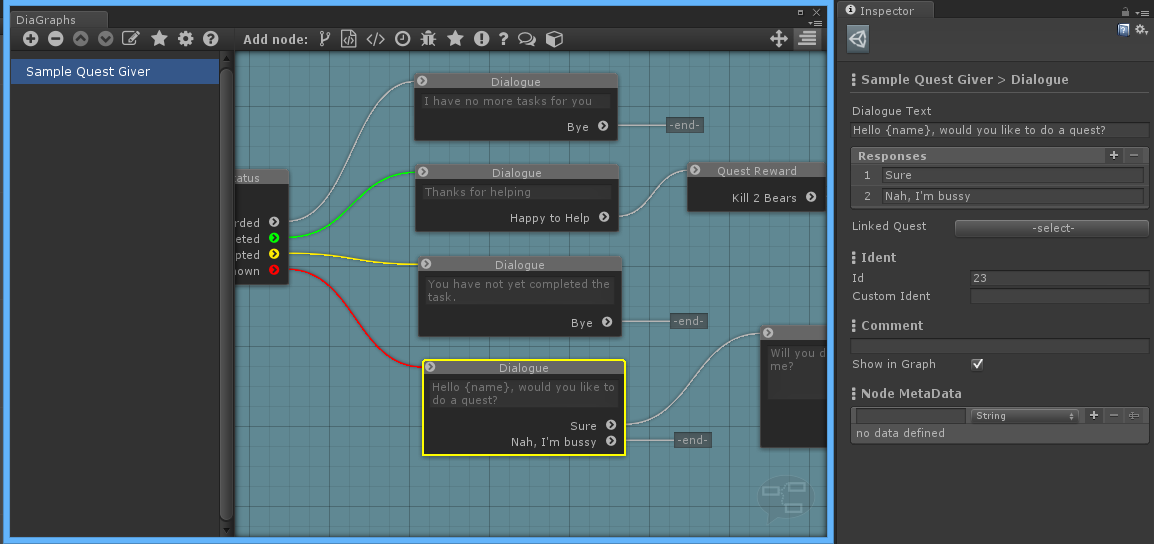
The Dialogue Panel can be shown when the player interacts with an NPC that has conversation created in DiaQ. The panel can show up to 3 responses that the player may choose from. You will have to modify the UI and scripts of you create dialogue nodes with more responses.
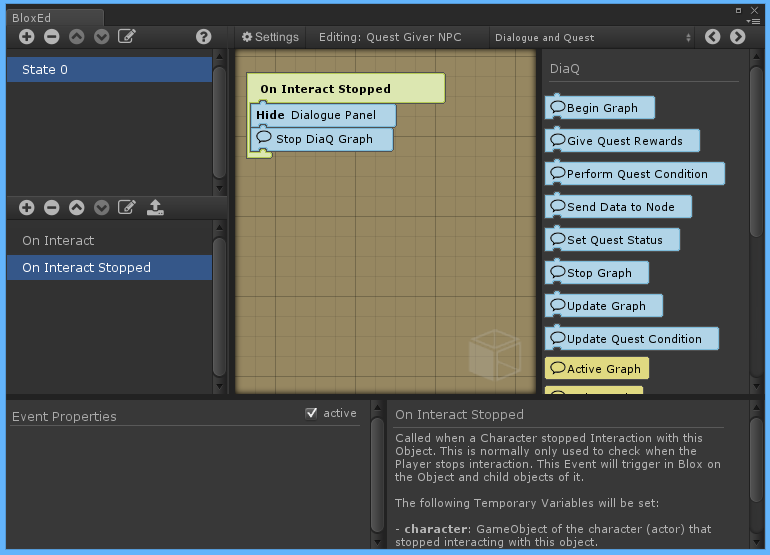
The panel must be opened via the Block GUI > plyRPG > Show Dialogue when the conversation is started and closed by the ‘Hide’ option of the same Block when interaction ends. You will normally start the DiaQ Graph in the On Interact Event of an NPC. At this point the graph will then run up to a point where it waits for player interaction so directly after the call to start the graph you can place a Block to show the Dialogue Panel, which will then populate with the info from the active graph node.
You will want to hide the dialogue panel in the On Interact Stopped Event of the NPC. It is also a good spot to force stop the graph.
Quest Log
The Quest Log shows all Quests that where accepted. Quests that where rewarded are not shown. So it is only accepted quests that might be completed but not yet handed in.