Make RPG: From Intro to Menu Screen
In this guide we will look at how you get started in plyGame. It will cover the Screens System which allows you to define the splash screens and tell plyGame what should happen after the splash screens where shown.
Splash Screens
 Open the Screens Editor, menu:
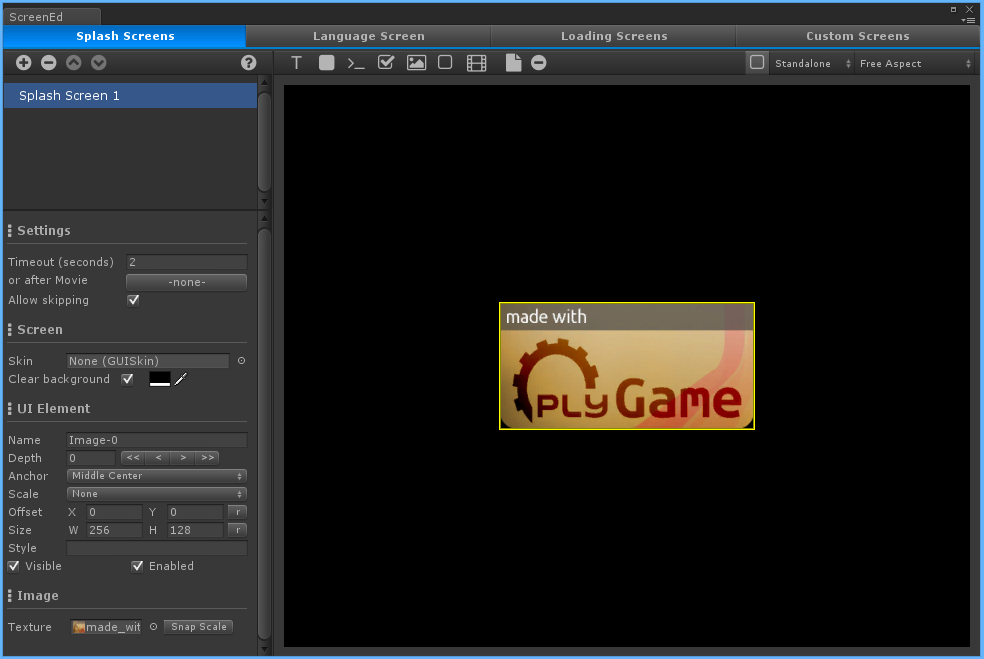
 Tools > PLYoung > plyGame > Screens Editor and select the Splash Screens tab. Here you can create the splash screens that will appear one after the other when the game starts up. To add a screen you simply click on the (+) button then select the screen to configure it.
The Screens System documentation explains all properties of screens and the available elements so I will not cover those in detail here. The plyGame Screens System makes use of Unity’s OnGUI to render the interface. This should be fine for splash screens and in many cases even for the game’s menus and in-game HUD.
I will create one splash screen that will show up when the game is started. Note than when a game starts a screen with “now loading” will be displayed to load the resources needed by the splash screen but this is normally so fast that you will hardly notice it.
My splash screen is simply a logo on a black background.
Language Screen
 Next is the
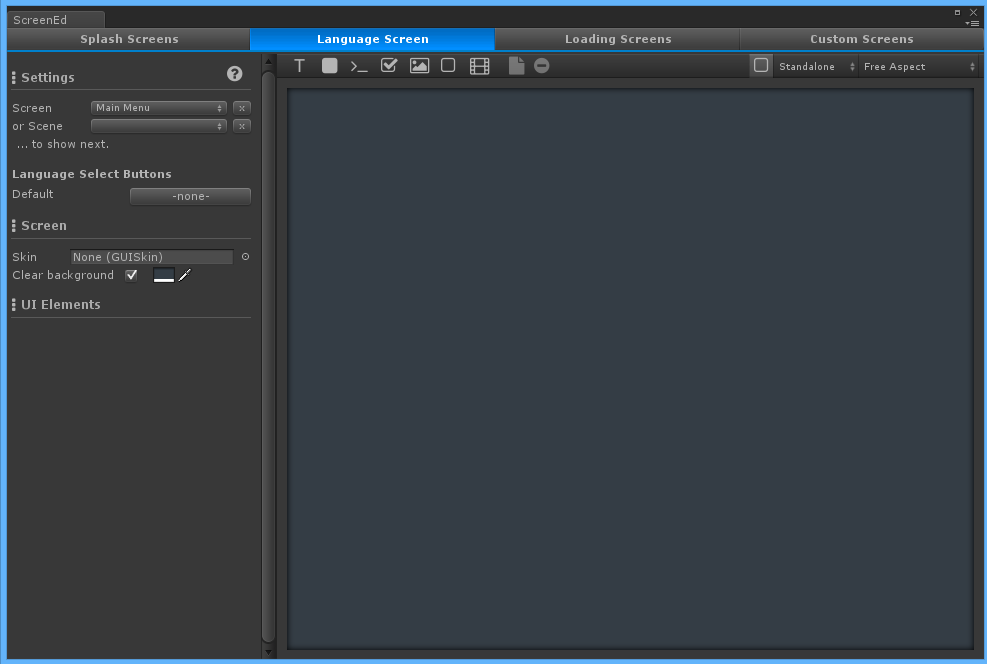
 Language Screen tab. The language screen tells plyGame what should follow after the splash screens are done. If you do not want the Language Screen to appear then do not add any elements to this screen. If you do add elements you need to configure the Language Buttons (in the screen’s properties) to indicate which languages are connected to which Button elements on the screen.
The only thing you need and must configure is the Screen or Scene that should be displayed next. If you do not set this then you will see and be stuck on a black now loadingscreen when you press play and the splash screens are done showing.
What you choose will depend on how your game works and what the next thing to happen should be. In most cases you will want to show some kind of main menu but some games might even go right into the game maps.
For my game I want to show a main menu. My main menu will be created as a Screen (in Custom Screen). You can design your main menu in another solution, like NGUI or Unity’s new GUI (uGUI from Unity 4.6 onward). These GUI are created as scenes and this is the scene you could set in the language screen settings to load next.
In my case I designed my main menu with the Screens System and will select it here. Obviously I am jumping ahead a bit so you will not have anything to select here yet. Remember to come back and select your Screen or Scene one you have it created.
Loading Screens
 The loading screens designed here are what is shown when you make use of the
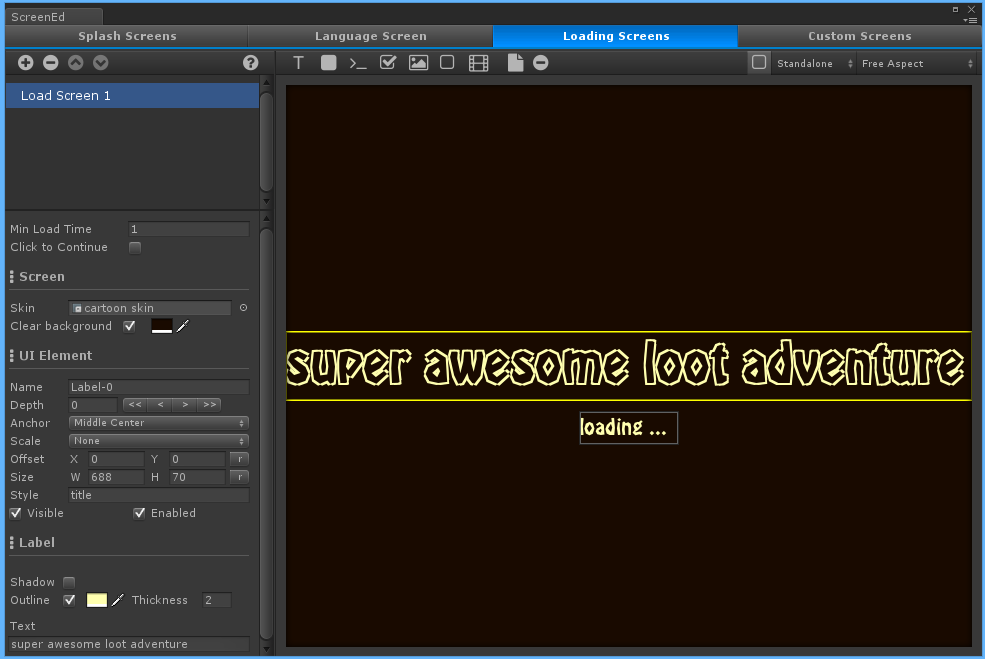
 GUI > Screens > Show Load Screen Block. It will choose a random loading screen and display it. These screens do not automatically go away. You need to tell plyGame when whatever might be loading is done loading. This is done by using the GUI > Screens > Hide All Screens Block. You normally do this in the Start event of a Blox of an object in the game scenes.
If you do not design any loading screens then a default black screen with now loading will be displayed when you use the Show Load Screen Block.
In my game there will be only one Loading Screen.
Main Menu
 Finally we have the
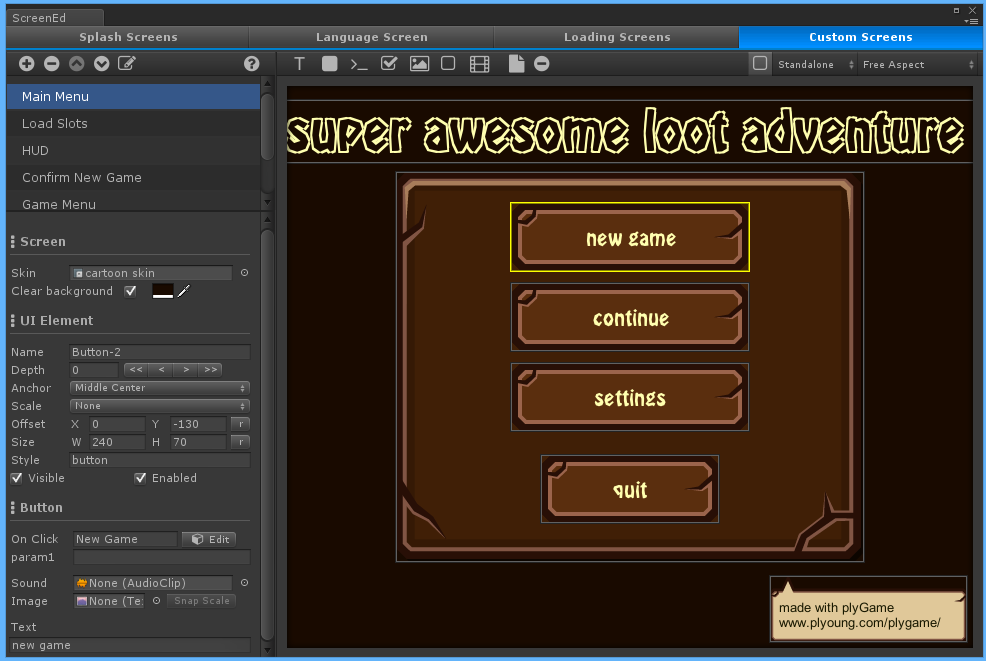
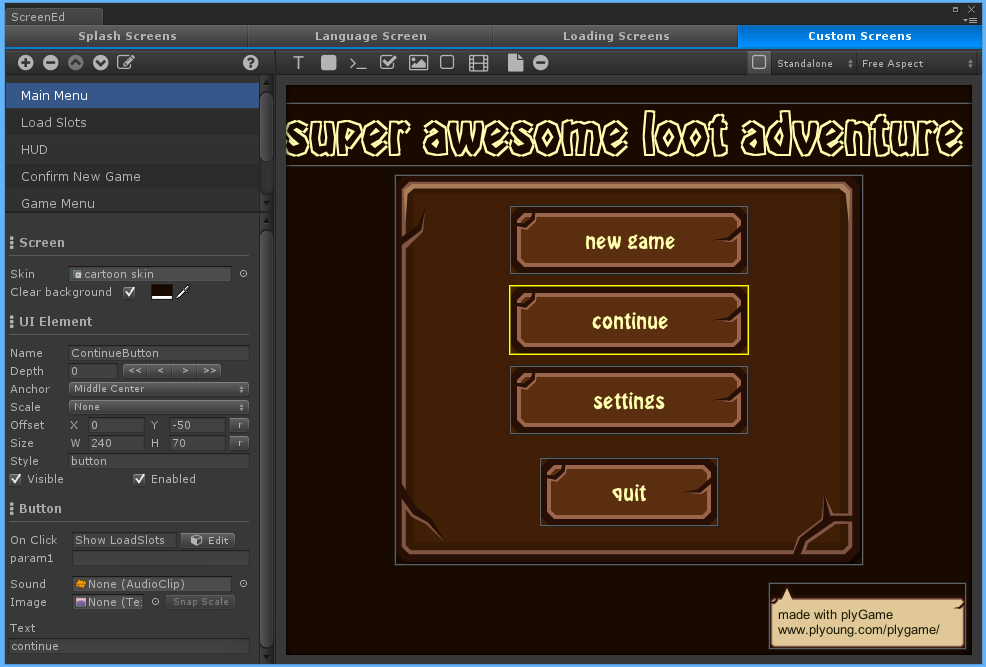
 Custom Screens. This might be your most used section of the screens system or the one you do not use at all, depending on what you decide to design your interface with. This is where you design the main menu and in-game (HUD) panels.
I’ve created a basic menu with options to start a new game, continue from a save, change some settings and to quit the game. For each of the buttons in the main menu I will have the following Events called when the buttons is clicked.
new game:New Gamecontinue:Show LoadSlotssettings:Show Settingsquit:Quit Game
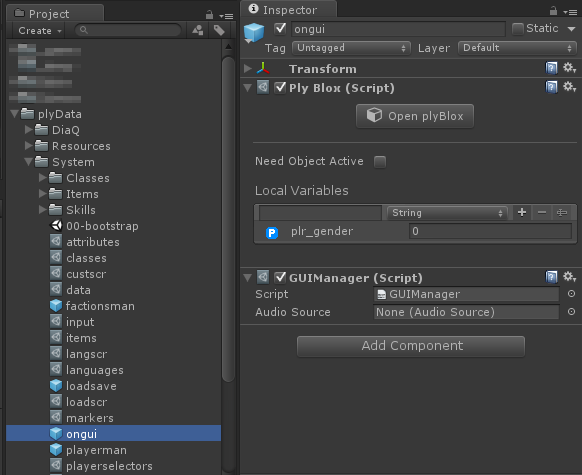
These Events are defined in the Blox of the Screens System’s prefab. This prefab can be found at Assets/plyData/System/ongui.prefab. You can access the Blox Editor for this Blox by either clicking the Edit button next to where you entered the event name or via the ongui prefab’s inspector.
New Game
 When the player click on
 new game I want to first check if there exist save data, which would mean the player already started a game session and I need to warn him that his old save data will be over written. In my game there is only one active profile but plyGame does support more than one profile (see the profile related Blocks on the IO group). If there is no save data then I will jump straight into the player character setup screen.
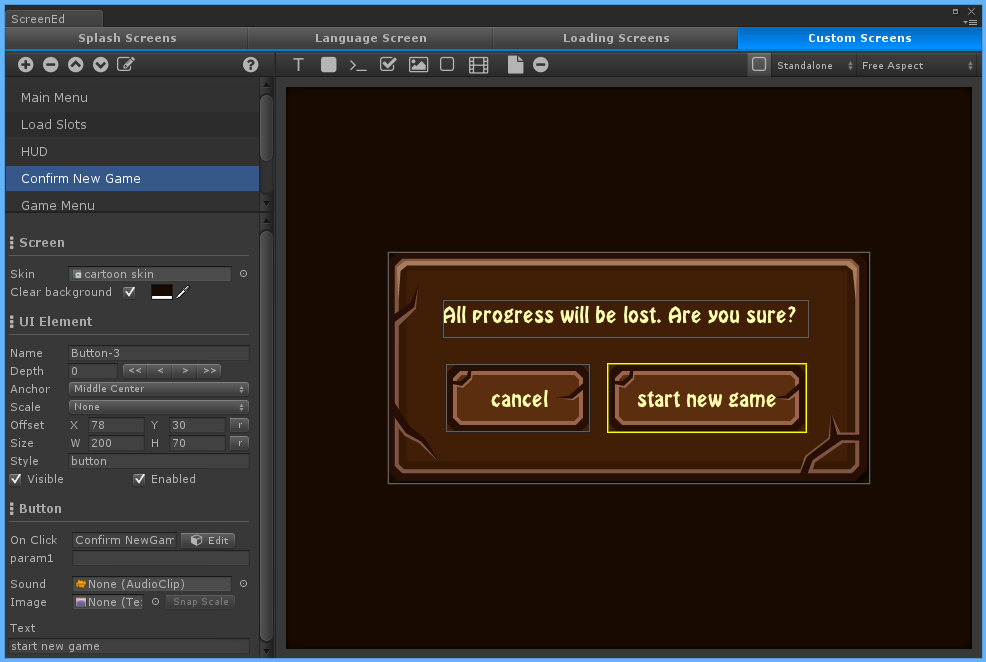
I’ve designed a basic confirmation window with two buttons,
cancel: which will call theBack to MainMenuEvent, andstart new game: button which will call theConfirm NewGameevent
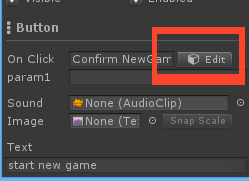
Let’s have a look at the New Game event, the one called when the plyer click on the new game button. Remember, these events are Common > Custum Events, created in the ONGUI (or Screens System’s) prefab. Easiest way to access it is to click on the edit button next to where you entered the event name in the button properties.
The event will check if there is save data. If so then show the confirmation screen, else load the player character selection scene which will be covered in another tutorial.
[@E:Common > Custom:: New Game@]
[@C:Flow > Condition > If:: If [@B:Flow > Comparison > Int: a = b:: [@B:Common > Values > Integer:: [H:Value0:H][V:Value0:V] @] = [@B:IO > LoadSave (plyGame) > Get Slot Count:: LoadSave Slot Count@] @] @]
    [@B:IO > LoadSave (plyGame) > Reset Last Load:: Reset Last-Load @]
    [@B:Flow > System > Load Level:: Load Level: [H:Load Level:player_select:H][V:Load Level:player_select:V] @]
[@C:Flow > Condition > Else:: Else @]
    [@B:GUI > Screens (plyGame) > Show Custom Screen:: Show Screen: [H:Show Screen:Confirm New Game:H][V:Show Screen:Confirm New Game:V] [H:AdditiveFalse:H]@]
[@C:  end  @]
The events called by the buttons on the confirmation screen is as follow.
The cancel button’s event simply shows the main menu screen.
[@E:Common > Custom:: Back to MainMenu@]
[@B:GUI > Screens (plyGame) > Show Custom Screen:: Show Screen: [H:Show Screen:Main Menu:H][V:Show Screen:Main Menu:V] [H:AdditiveFalse:H]@]
and the start new game button’s event will reset the last load data (this is important when you start a new game and do not load from a save), the run through all slots and delete them, and finally load the player character selection scene (to be covered in another tutorial).
[@E:Common > Custom:: Confirm NewGame@]
[@B:IO > LoadSave (plyGame) > Reset Last Load:: Reset Last-Load @]
[@C:Flow > Loop > Loop with:: Loop with [H:Counter NameslotIdx:H][V:Counter NameslotIdx:V] : from [@B:Common > Values > Integer:: [H:Value0:H][V:Value0:V] @] to [@B:IO > LoadSave (plyGame) > Get Slot Count:: LoadSave Slot Count@] [H:One lessTrue:H]@]
    [@B:IO > LoadSave (plyGame) > Delete Slot:: Delete all data in Slot [@B:IO > LoadSave (plyGame) > Get Slot Number:: Get LoadSave Slot Number at index [@B:Variables > Temp Variables > Get Temp Int:: [H:GetslotIdx:H][V:GetslotIdx:V] as Integer @] @] @]
[@C:  end  @]
[@B:Flow > System > Load Level:: Load Level: [H:Load Level:player_select:H][V:Load Level:player_select:V] @]
Continue
 The
The continue button is used to show a list of save slots that the player can restore a saved session from. We would want this button to be disabled if there are no save data yet so lets create an event (in the Screens System’s Blox) that will handle this.
I will use the On Screen Shown Event to check when the Main Menu screen is shown and then decide whether the continue button should be enabled or disabled. I’ll also use this opportunity to start some music to play in the menu.
I first check if the screen that became visible is the main menu by comparing its name with that of the screenName temporary variable that was set by the event.
The music starting Block has a property only if none playing which I will enable. This will prevent the playing music from restarting each time the main menu becomes visible. For example when the player moves to and from the settings screen.
Next a simple If block checks if there is save data and if not it will disable the button. By default the button is enabled so I do not have to add an Else Block to set this state.
[@E:GUI > On Screen Shown:: On Screen Shown@]
[@C:Flow > Condition > If:: If [@B:Flow > Comparison > String: a = b:: [@B:Common > Values > String:: [H:ValueMain Menu:H][V:ValueMain Menu:V] @] = [@B:Variables > Temp Variables > Get Temp String:: [H:GetscreenName:H][V:GetscreenName:V] as String @] @] @]
    [@B:Audio > Sound (plyGame) > Play Music:: Play Music [@B:Common > Values > UnityObject:: [H:ValueFantasy Dreams (Menu-Credits 90s) (AudioClip):H][V:ValueFantasy Dreams (Menu-Credits 90s) (AudioClip):V] @] [H:Only if none playingTrue:H]@]
    [@C:Flow > Condition > If:: If [@B:Flow > Comparison > Int: a = b:: [@B:Common > Values > Integer:: [H:Value0:H][V:Value0:V] @] = [@B:IO > LoadSave (plyGame) > Get Slot Count:: LoadSave Slot Count@] @] @]
        [@B:GUI > Screens (plyGame) > Set Enabled:: Set [H:SetContinueButton:H][V:SetContinueButton:V] on [H:onMain Menu:H][V:onMain Menu:V] to [H:stateDisabled:H][V:stateDisabled:V] @]
    [@C:  end  @]
[@C:  end  @]
 The
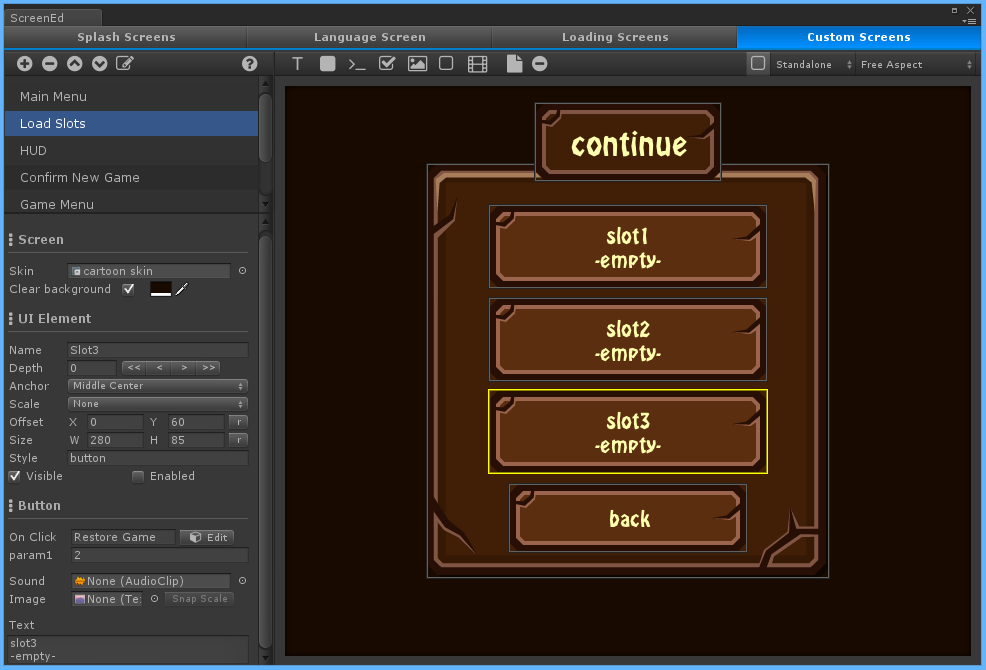
The Load Slots screen has 3 buttons that are used to select one of the 3 slots that the player can save to and a button to return to the main menu. The slot buttons will all call the same Event, Restore Game, while the back button will call Back to MainMenu (which was covered in the confirmation screen section above).
All three the slot buttons are calling the same event but the way I distinguish between which slot to actually load is done by changing the value in the param1 field. I know that the LoadSave System works with slots indexed by numbers starting at zero (0). So when the slot 1 button is clicked I want to load slot 0, so I set param1 = 0, for slot 2 it is set to 1, and for slot 3 it is set to 2.
The Restore Game Event is a Custom event that will then show the loading screen and ask plyGame to restore the session from the slot specified by param1.
[@E:Common > Custom:: Restore Game@]
[@B:GUI > Screens (plyGame) > Show Load Screen:: Show Load Screen [@B:-random-@] @]
[@B:IO > LoadSave (plyGame) > Load Game:: Load Game from Slot [@B:Variables > Temp Variables > Get Temp Int:: [H:Getparam1:H][V:Getparam1:V] as Integer @] @]
The Show LoadSlots Event, called by the continue button on the Main Menu, will look like this.
By default all the slot buttons are set to be disabled. This is done by clearing the Enabled toggle in the button’s properties (see screenshot). So, before the event shows the slots screen it will first need to enable this slot buttons associated with slots that has save data, else the player can’t click on them. At the same time I will also update the text on the buttons to show the last dat and time a save was done in that slot.
[@E:Common > Custom:: Show LoadSlots@]
[@C:Flow > Condition > If:: If [@B:Flow > Comparison > NOT a:: Not [@B:Flow > Comparison > String Is Empty:: [@B:IO > LoadSave (plyGame) > Get Slot DateTime:: Slot [@B:Common > Values > Integer:: [H:Value0:H][V:Value0:V] @] DateTime @] is empty @] @] @]
    [@B:GUI > Screens (plyGame) > Set Enabled:: Set [H:SetSlot1:H][V:SetSlot1:V] on [H:onLoad Slots:H][V:onLoad Slots:V] to [H:stateEnabled:H][V:stateEnabled:V] @]
    [@B:GUI > Screens (plyGame) > Set Text:: Set Text of [H:Set Text ofSlot1:H][V:Set Text ofSlot1:V] on [H:onLoad Slots:H][V:onLoad Slots:V] to [@B:Common > String > String: A + B:: String [@B:Common > Values > String:: [H:Valueslot1:H][V:Valueslot1:V] @] + [@B:IO > LoadSave (plyGame) > Get Slot DateTime:: Slot [@B:Common > Values > Integer:: [H:Value0:H][V:Value0:V] @] DateTime @] @] @]
[@C:  end  @]
[@C:Flow > Condition > If:: If [@B:Flow > Comparison > NOT a:: Not [@B:Flow > Comparison > String Is Empty:: [@B:IO > LoadSave (plyGame) > Get Slot DateTime:: Slot [@B:Common > Values > Integer:: [H:Value1:H][V:Value1:V] @] DateTime @] is empty @] @] @]
    [@B:GUI > Screens (plyGame) > Set Enabled:: Set [H:SetSlot2:H][V:SetSlot2:V] on [H:onLoad Slots:H][V:onLoad Slots:V] to [H:stateEnabled:H][V:stateEnabled:V] @]
    [@B:GUI > Screens (plyGame) > Set Text:: Set Text of [H:Set Text ofSlot2:H][V:Set Text ofSlot2:V] on [H:onLoad Slots:H][V:onLoad Slots:V] to [@B:Common > String > String: A + B:: String [@B:Common > Values > String:: [H:Valueslot2:H][V:Valueslot2:V] @] + [@B:IO > LoadSave (plyGame) > Get Slot DateTime:: Slot [@B:Common > Values > Integer:: [H:Value1:H][V:Value1:V] @] DateTime @] @] @]
[@C:  end  @]
[@C:Flow > Condition > If:: If [@B:Flow > Comparison > NOT a:: Not [@B:Flow > Comparison > String Is Empty:: [@B:IO > LoadSave (plyGame) > Get Slot DateTime:: Slot [@B:Common > Values > Integer:: [H:Value2:H][V:Value2:V] @] DateTime @] is empty @] @] @]
    [@B:GUI > Screens (plyGame) > Set Enabled:: Set [H:SetSlot3:H][V:SetSlot3:V] on [H:onLoad Slots:H][V:onLoad Slots:V] to [H:stateEnabled:H][V:stateEnabled:V] @]
    [@B:GUI > Screens (plyGame) > Set Text:: Set Text of [H:Set Text ofSlot3:H][V:Set Text ofSlot3:V] on [H:onLoad Slots:H][V:onLoad Slots:V] to [@B:Common > String > String: A + B:: String [@B:Common > Values > String:: [H:Valueslot3:H][V:Valueslot3:V] @] + [@B:IO > LoadSave (plyGame) > Get Slot DateTime:: Slot [@B:Common > Values > Integer:: [H:Value2:H][V:Value2:V] @] DateTime @] @] @]
[@C:  end  @]
[@B:GUI > Screens (plyGame) > Show Custom Screen:: Show Screen: [H:Show Screen:Load Slots:H][V:Show Screen:Load Slots:V] [H:AdditiveFalse:H]@]
Settings
The Settings screen will be covered in another tutorial.
Quit
The quit button calls the Quit Game event which simply uses one Block to exit the game.
[@E:Common > Custom:: Quit Game@]
[@B:Flow > System > Exit Game:: Exit Game @]
That is it for the main menu. The Settings Screen and Player Character Selection scene and screen will be looked at in tutorials to follow.