Loading & Saving
plyGame has a system for saving and loading the game settings and player progress. It is provided through a LoadSave Provider which handles the actual data being saved. Where and how the data is saved is up to the LoadSave provider. A default provider, based on Unity’s PlayerPrefs is included in plyGame.
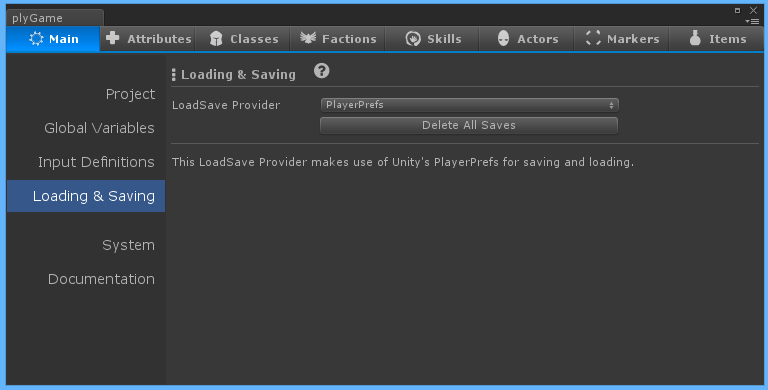
You can change the Provider to use by going to plyGame Main Editor: Main > Loading & Saving and choosing the provider from the drop-down list. There might be extra options to configure, depending on the provider you choose to use. These options will be shown below the drop-down.
During development you might be creating a lot of save data that might not be used and could even cause problems in testing. The ‘delete’ button can be used to request that the LoadSave provider remove all saved data. This is basically making a call to the LoadSave provider’s DeleteAll() function to delete all saved keys.
Have a look at the API Info if you are interested in creating and adding your own provider.
The Persistable Object component should be on any object that will be saved or restored by the LoadSave system. This component provides the interface between the LoadSave system and the object to be saved. It has a few options to set some basic info that can be saved and will make sure to call any other components on the object that is LoadSave aware. The other components will have their own settings to specify if they should take part in loading/ saving and what data they will commit to this.
plyBlox
The Loading & Saving System adds new Blocks to plyBlox which can be used to access the system. Note that there are Blocks related to Unity’s PlayerPrefs too, they are not the same as the LoadSave System’s Blocks and is used to specifically deal with PlayerPrefs. If you want to work through your chosen LoadSave Provider then you need to make use of the provided LoadSave Blocks. The Blocks will be found under IO > LoadSave (plyGame).
The LoadSave System works with save slots so you will have to specify the slot that you want to load from or save to. It is best to make use of positive numbers for this. The slot is initialized to ‘0’ by plyGame and will stay that if you do not change it via a Block.
When a “new game” is started by the player you need to inform the LoadSave system by using the Reset Last Load Block. If you do not do this and a load occurred previously, plyGame might be in a state where it thinks you loaded from a previous slot and then use data from that slot when saving and corrupt the new save data.
Variables
The LoadSave System can save/ restore the Local Variables of a plyBlox object and Global Variables of the plyBlox System and metaData of objects making use of MmtaData but there are a few types that are not supported. Temporary variables are not supported since they are not supposed to be valid outside the scope of a running Event. The Local Variables of a GameObject (plyBlox Component) can only be saved if that object has the Persistable Object component on it and the component is configured to include variables in saving and loading. metaData is normally associated with something specific and not gameObjects or prefabs, so they do not need a Persistable component on and whether they are saved or not will depend of the context they are used in.
The unsupported variable types include the object types: GameObject, UnityObject and SystemObject. Do not rely on these being saved or restored, besides, they are typically only used to provide extra information to the runtime or in temporary variables during runtime.
In detail
The LoadSave System works with save slots so you will have to specify the slot that you want to load from or save to. You can choose to also set a Profile to save under. Profiles will allow more than one player to play the game on the same device without influencing each other’s saves. If you are not working with profiles then simply ignore the blocks related to it. If you are using profiles then you need to make sure you always set the active profile before calling a save or load related block.
If your game auto saves the player progress or do not allow the player to save progress into different slots then you can ignore the slots system. Simply pass ‘0’ anywhere you are forced to specify a slot.
A typical flow of the game might be where the player starts a New Game, enters a scene, do some stuff, and then moves onto the next scene, and scenes to follow or continuously between scenes. At any time you should be able to make a call to plyGame, via a Block, to save the game state/ session. A problem occurs when the player moves from one scene to another, the previous scene’s objects get destroyed and there is no way to know in what state they where after that.
plyGame allows you to set objects, like character, as persistent and will track the state of these between scene changes. For this it makes use of a temporary key store to save the state of these objects when the scene will be destroyed (player moves to another scene).
When the player returns to an old scene the state of objects will come from what was previously saved in the active slot and also from the keys currently in the temporary store, with the temporary store key values overriding any keys that where saved before (with same key name).
When you make a call to save the game session all the keys from the temporary store will be saved, plus keys from the currently open scene, and then the temporary store will be cleared of all its keys.
There might be quite a few keys, and data related to these keys, generated over time. You can keep this down by careful design. Take a shopkeeper NPC for example. If it never moves around then you will not want to set its position to be saved, but you might want its inventory state to be saved if that is important to you.
Another example could be where you have a pack of wolfs. Rather than placing these wolfs in the scene and setting each of them to be persistent you could rather use a spawn point that knows how to spawn wolfs and set it persistent. You could set the spawn point to only ever spawn 5 wolfs, so it will spawn them, the player might kill 3 and 2 are left. This state is saved so that when the player enters the scene again at a later time only 2 wolfs will be spawned. The 2 wolfs will spawn with full health even if the player dealt some damage to one of them before running off but this should not matter too much. You need to find a balance between what is acceptable in terms of game-play. At least you did not save the state of 5 wolfs but only the state of one spawn point and the important thing, there only being 2 of the 5 wolfs left, has been dealt with.
The default slot, -1, will be prevented from being saved by the LoadSave Provider. It is a special slot used when you press the Unity Play button so that you can test the scene in an unsaved state, else it would have been restored from save data and you would have to use the Delete button to clear it all each time. If you use the plyGame Play button or test a stand-alone build then plyGame will initialise the slot to ‘0’ so you do not have to worry about the slot if you do not work with save slots and do not want to give the player the option to save to different slots. The slot is initialized to ‘0’ just after the splash screens where shown.
When the player choose to start a new game (or start over) you will have to delete all the slots under the current/ active profile. If you do not do this and override an old save slot you will find that data get corrupt as plyGame has no way of knowing if keys already saved is keys related to further progression in the game or not. So the rule is, if the player starts a new game you warn him that he will lose all progress and then delete all the slots of the current profile; else, give the player an option to create a new profile and use profiles in your game.
API & Scripting
Take care when working with objects that are initialised by the LoadSave System. Loading of an object’s settings can only take place after Awake and Start are done, so the first frame of Update is used for loading/ restoring the object’s state. It is best to wait at least one frame in components that interact with components of an object that uses the LoadSave system.
void Awake()
{
    loading = true;
}

void Update()
{
    if (loading)
    {
        // after this the loading system should be done
        loading = false;

        // skipping the first frame. loading being true indicated
        // that this was the 1st frame in this object's life.
        return;
    }

    // ...
}
Making your Components LoadSave aware
A GameObject is made LoadSave aware via the Persistable Object components. This component will make calls to all components on the object that implements the IPersistable interface.
You must add a unique string to the key passed in Save() and Load() and not use it directly. A good idea might be to use the component’s name, for example newKey = key + “.” + name_of_component_class. You can use a shorter string to append, just make sure it does not clash with keys chosen by other components.
You might have more than one value to save, in that case you would append further strings to the key to identify the data uniquely. For example, you want to save two values,
- key1 = key + “.” + component_name + “.a”;
- key2 = key + “.” + component_name + “.b”;
Be sure to use the same way to generate the keys needed when loading. You will make calls to GameGlobal.Instance.Set and Get functions to do the actual saving and loading, using your newly created key and the value to save.
Custom Provider
The runtime source for plyGame is available in \Assets\plyoung\plyGame\Documentation\plyGame-src.zip. Extract this and find the System/LoadSave folder to see some sample classes from the default LoadSave Provider. Have a look at the API Reference to learn more about the base class and the virtual functions that you can override.
You can create a LoadSave Provider to handle the saving and loading in plyGame. The default system makes use of Unity’s PlayerPrefs but you can easily create and add a system that saves data in another way. This new provider, if created correctly, will become an option for selection in the plyGame Main Editor.
LoadSave Provider
The first script needed is the actual LoadSave Provider. It needs to be derived from LoadSaveProviderBase and override some functions.
The following code sample is an extract from the default LoadSave provider, based on Unity’s PlayerPrefs.
using UnityEngine;
using System.Collections;
using System.Collections.Generic;
using plyGame;

[AddComponentMenu("")]
public class LoadSave_PlayerPrefs : LoadSaveProviderBase
{
    public override void Save()
    {
        PlayerPrefs.Save();
    }

    public override void SetString(string key, string value)
    {
        PlayerPrefs.SetString(key, value);
    }
...
Editor

Next you need to add the editor script that will tell plyGame about the new provider and allow you to render extra options or settings for your LoadSave provider. It needs to be derived from LoadSaveProviderEdBase.
The editor must have a LoadSaveProviderthat helps plyGame identify it and tells plyGame what provider this editor is made to edit. Like any other editor script this one needs to go into a sub folder called Editor somewhere in the Assets folder.
Because the LoadSave Provider is created as a GameObject at runtime from a Prefab you can easily have added configuration options to your provider script which can be edited by the editor script.
The following is an extract from the default provider’s editor with some notes on how it could have been changed if it had configuration options to render.
using UnityEngine;
using UnityEditor;
using plyGame;
using plyGameEditor;

[LoadSaveProvider(
    "Default", // Name of LoadSave provider, shown in drop-down selection
    typeof(LoadSave_PlayerPrefs) // The LoadSave Provider this editor handles
    )]
public class LoadSaveProviderEd_PlayerPrefs : LoadSaveProviderEdBase
{
    public override void OnGUI(EditorWindow ed, LoadSaveProviderBase data)
    {
        GUILayout.Label("This is the Default LoadSave Provider. It makes use\nof Unity's PlayerPrefs for saving and loading.");

        // *** The default provider does not have any settings to configure but if yours
        // *** did you could easily do the following to handle it...

        EditorGUI.BeginChangeCheck();

        // draw all the options/ settings
        data.someSettings = EditorGUILayout.TextField("Some setting", data.someSettings);

        if (EditorGUI.EndChangeCheck())
        {
            // make sure to save the changes
            EditorUtility.SetDirty(data);
        }
    }
}