Localization
The Languages System provides an interface that other Systems can use to provide support for localizations. The DiaQ System is one such system that makes use of this System for its localization.
Under plyGame this editor can be opened from the plyGame Main Editor Window: Main > Project > Edit Languages. In DiaQ the editor can be opened from the DiaQ Settings Window, menu: Tools > PLYoung > DiaQ > Settings.
There is one “default” language, the one you use to enter text while editing various section of the game. For example, the language used when creating Dialogue Nodes in DiaQ. This language can not be edited in the language editor. So you only add languages other than the default one. In this documentation I will assume English is to be the default language.
With the Language Editor open, to add a new Language, click on the (+) button. A new language entry called “Language” will be added. You can now use the Rename button to rename this new language.
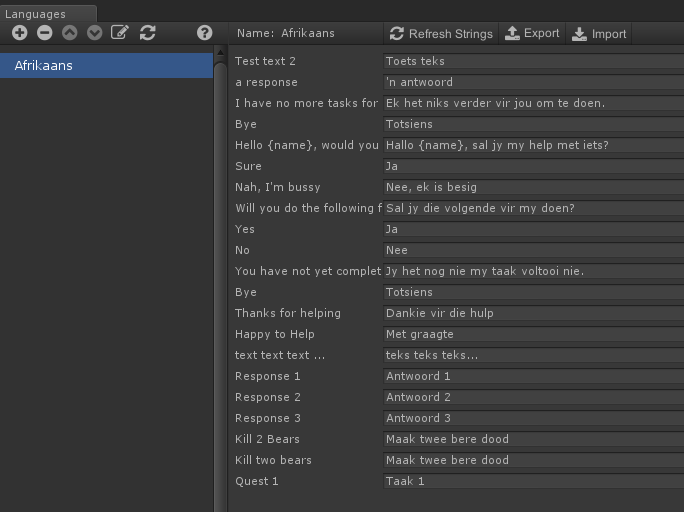
Click on the newly created language to see all the strings/ text collected from the project. If you have not yet done so, press the Refresh button so that the Language System can query the supported systems for new/ updated strings/ text. You need to press the Refresh button each time you want the system to pull in the latest additions or changes to the strings.
By default the default language string will be added to the language’s string line. You may edit this in the right-hand panel. Any text edited here will not be replaced when you press Refresh so if you want a line back to its default language you need to clear it before pressing Refresh.
The Export button allows you to export the strings of a language to a file. This can then be edited in another application. The Import buttons allows you to import the strings from a file and override the strings for that language in the project.
Each string has a number (ID) to identify it by. Do not change this number. You might notice duplicate strings in your exported file. This is fine as you might have used the same string structure several times. With DiaQ for example you might have the same response text for different dialogue nodes. The language system does not work on the string/ text directly and assumes each string to be something different from the other. Simply add the translated text for each string/ text line.
Supported File Formats
The values exported are:
- ID of the string
- The String in the Default Language (this is to help identify what the translation must be)
- The String in Default or Translated text (this is what you will change)
CSV
Extension: .csv
This is a popular format when exporting data to be imported into a spreadsheet and other applications. The application you edit the text in will be able to export back to CSV format. The separator/ field delimiter is a comma [ , ]. and the text delimiter [ " ] is used where needed.
Runtime Use
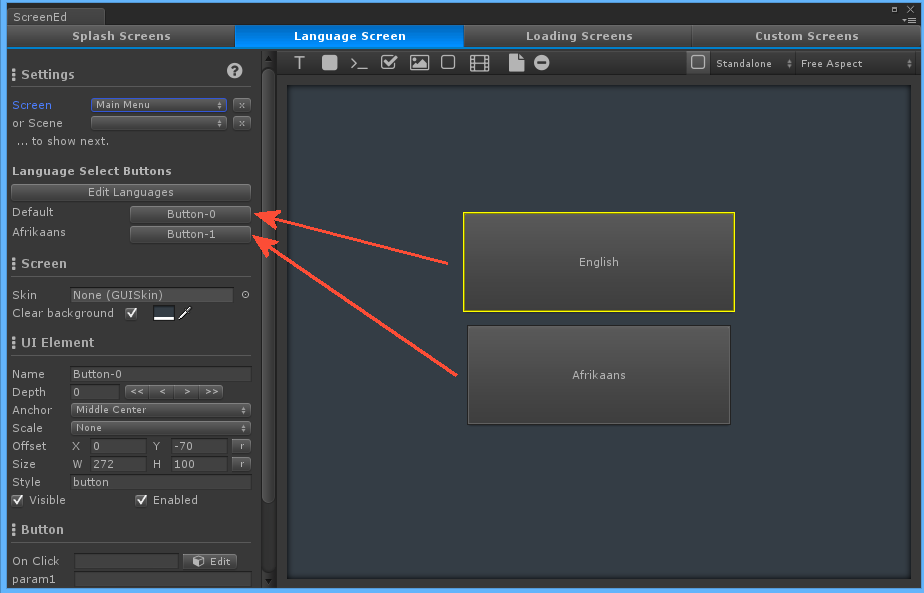
The one way to choose the active language at run-time is to make use of plyGame’s Screens System. You can add Button to the Language Screen editor and then link them to each of the languages. This screen will appear right after the Splash Screens and allow the player to choose a language. After that the selected Screen or Scene (level) will be loaded.
In this example I only defined on language, Afrikaans, while English is the default language. So I created two buttons, one to indicate the player wants to use the default language and one for then the player wants to use Afrikaans. You must link a Button element to each of the Languages shown in the left-hand panel when using this feature.
If you want to create your language selection screen in another solution you may use plyBlox to set the language in a Blox Event called by the button. The Block Common > Misc > Set Language can be sued for this.
To set the language via script you need to make a call to Languages.Instance.SetActiveLanguage(language_name);. You might also want to register a listener that will update the strings in your system when the language is changed. This is done via Languages.Instance.RegisterLanguageChangeListener(callback);. Note that you do not register a listener for DiaQ or other systems of plyGame and Blox as they already do this and will be notified when you change the active language via call to SetActiveLanguage.
The technical part
The languages system makes use of Unity’s Resources folder concept. You will notice the string asset files being created under the plyData/Resources/ folder. The default language’s strings are stored in plyData/Resources/strings.asset while the strings for each language is stored in a folder named the same name as the language, for example plyData/Resources/Afrikaans/strings.asset
When you instruct the system to use a specific language the strings.asset for that language will be loaded and the strings in the project replaced with the strings from that file.
Never move, renamed or delete the folders and files in plyData.